Most tents go up the same way once you know the order: choose the spot, lay the tent out, put in the poles or the air, peg it down, guy it out and tighten it. What makes the difference is doing it in the right order, with the right pegs, facing the right way, and keeping the inside dry when it rains. This guide takes each step in turn, from a practice pitch at home to taking the tent down on a wet morning and getting it home without it going mouldy. If you have not chosen a tent yet, how to choose a tent is the place to start.
Before the trip: the practice pitch at home
Put a new tent up in the garden or a park before you take it anywhere. The Camping and Caravanning Club gives the plainest reason: pitching at home first shows up any missing or faulty parts while there is still time to replace them. It also means the first time you work out which pole goes where is on a dry afternoon, not on a campsite in the rain at dusk.
What to do on the practice pitch
- Read the maker's instructions, then follow them once, slowly. Many tents have colour-coded poles and sleeves, and seeing which colour goes where once is worth a lot later.
- Count everything out of the bag: poles, pegs, guy lines, the pump for an air tent, and any separate parts such as a porch pole or an inner tent. Count it all back in.
- Time yourself. Cotswold Outdoor says most two or three person tents take five to ten minutes once you know the routine, and a six-person family tent twenty-five to thirty, especially with two of you. Your first go will take longer.
- Practise the packing too. Getting a tent back into its bag is a knack, and a pop-up tent's spring frame is the hardest of all to fold the first time.
What to pack with the tent
The pegs that come with a tent are often thin and few, so take spares made for the ground you expect. A mallet saves bent pegs on firm ground: the tent mallets range has rubber mallets for ordinary pegs and steel hammers with a peg puller for steel pegs. Pack a small repair kit from tent repair kits, the pump for an air tent, and a towel.
Choosing the spot: flat, drained, sheltered
Where you put the tent matters as much as how you put it up. A good pitch on a poor spot will still leave you wet or awake.
Flat, and not in a dip
Look for ground that is as flat as you can find. If there is a slope, the Camping and Caravanning Club says to lie with your head higher than your feet, and to face the door downhill so rain does not run in. Never pitch in a hollow or a dip, however sheltered it feels, because rain runs into it and collects there overnight; avoid marshy, rushy ground for the same reason. Slightly raised ground drains best. Cotswold Outdoor adds that digging a trench round the tent is not allowed on most UK campsites, so choose ground that drains rather than trying to make it drain.
Clear the ground
Walk the pitch and clear stones, sticks and old tent pegs, which can pierce a groundsheet. A footprint under the tent takes that wear instead of the floor. It should be a little smaller than the floor, or folded under, because any part that sticks out catches rain and runs it underneath. See groundsheets and footprints.
Sheltered, but not under trees
A hedge, a wall or a bank on the windward side makes a real difference on a breezy night, and the Club suggests using hedges as windbreaks. Trees are a different matter. Both the Club and Cotswold Outdoor say not to pitch right under them: dead branches can fall in a storm, and trees drip sap and bird droppings on the flysheet long after the rain has stopped.
On a campsite
Keep inside the pitch markers, with room for every guy line, and leave space between your tent and the next. GOV.UK's fire safety advice says tents should be at least six metres apart and away from parked cars, so that a fire cannot spread from one to the next.
Which way to face the wind
Find out which way the wind is blowing before you unpack, and check the forecast, because it can change overnight. Then turn the tent so that:
- The narrow or low end faces into the wind. The wind then slips over the top of the tent rather than pushing on its broad side. Cotswold Outdoor says the same: the smallest, most streamlined end into the prevailing wind.
- The door faces away from the wind, so rain does not blow in each time you open it and the door does not fill like a sail. The Club says this matters most for tunnel tents, which catch the wind easily.
How you do it depends on the tent. A dome tent stands up on its own before it is pegged, so you can put it up, pick it up and turn it to face the right way, then peg it. A tunnel tent only stands once it is pegged at both ends, so lay it out facing the right way from the start, with its low back end into the wind. A tipi or pyramid is the same shape all round, so turn its door away from the wind.
Pitching order: inner first, flysheet first, or both together
A double-layer tent has two parts: a breathable inner tent, where you sleep, and a waterproof flysheet over it. Tents differ in which goes up first, and it is worth knowing which kind yours is before the first wet evening. The guide to single, double and triple layer tents explains why the two layers matter.
Inner first
Many dome tents are pitched inner first: you peg out the inner, clip it onto the poles so it stands, then throw the flysheet over and peg it down. It is quick on a dry day, but in rain the breathable inner is open to the sky until the flysheet goes on.
Flysheet first
Many tunnel tents, backpacking tents and pyramids are pitched flysheet first, with the inner clipped or hung inside afterwards. Cotswold Outdoor recommends pitching outer first in rain because the inner stays dry. Several pyramid tents here are sold as the flysheet alone, with the inner as an extra.
Both together
Some tents go up with the inner left hanging inside the flysheet, all in one, and you can do it with many flysheet-first tents by leaving the inner clipped in when you pack. Air tents go up all in one too, as the guide to air tents and pole tents explains.
The usual order, whichever kind
- Lay out the footprint, if you use one, and the tent on top of it, facing the right way to the wind.
- Zip the doors shut. The Club says to do this before pegging the corners, so the tent is pegged out at the right tension and the zips are not strained later.
- Peg the corners, without pulling the groundsheet drum-tight.
- Put the poles together, every joint pushed fully home, and push them through their sleeves rather than pulling. A pulled pole can come apart inside the sleeve.
- Raise the tent, put on the flysheet if it is separate, and peg it down.
- Peg out the guy lines, then go round and even up the tension.
Pole tents differ in their poles, and a pole that has seen many seasons may need replacing; the guide to tent poles covers each kind, and the tent poles range has replacements from about 7.9mm to 11mm across.
Pegs: angle, depth, and the right peg for the ground
Pegs are what keep the tent on the ground, and most pegging problems come from the wrong peg, the wrong angle, or not enough of them.
The angle
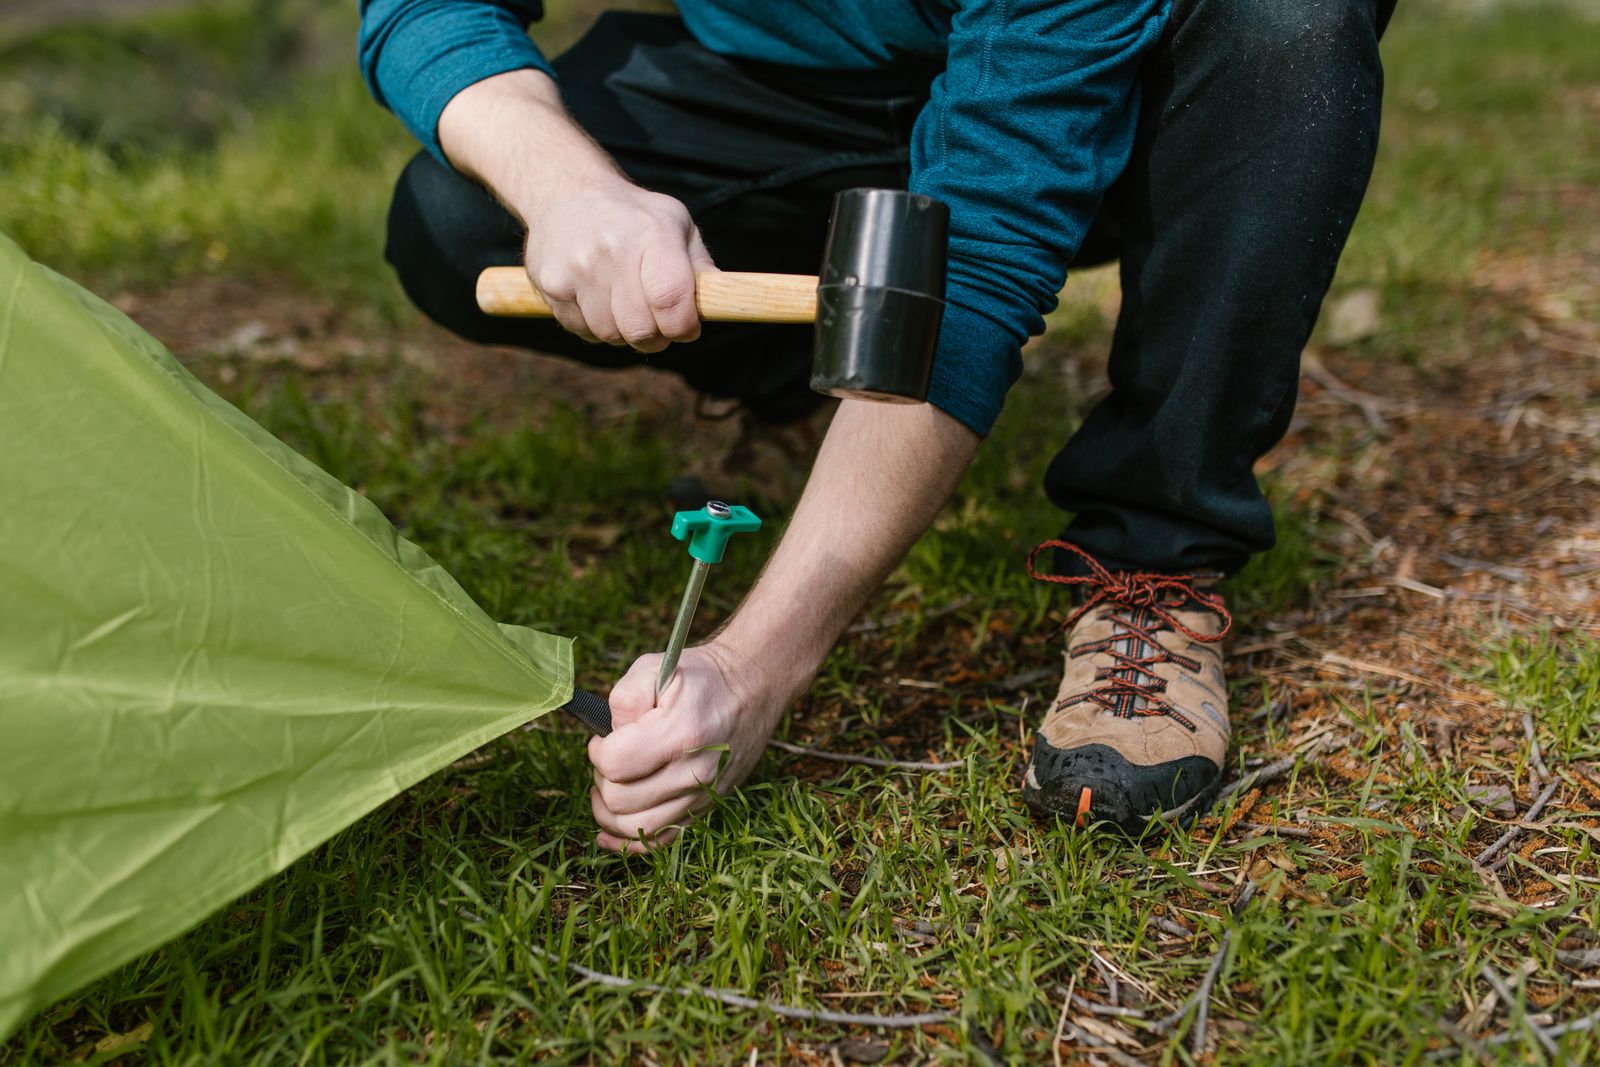
Push or tap each peg in at an angle, leaning away from the tent. The angle commonly given is about 45 degrees: Cotswold Outdoor, Pitchup and Hipcamp all say so. Set that way, the pull of the line or the tent presses the peg into the ground; set straight up and down, it pulls out much more easily. Turn the hook, if the peg has one, away from the tent, so the loop cannot slide off.
The depth
Push the peg in until only its head, or a small loop of line, is above ground, as Cotswold Outdoor advises. A peg left sticking up is easy to trip over and to bend. Pegs with a cord or reflective loop, as several here have, are easier to lift out and to find in long grass.
When a peg will not go in
Do not force it. A peg that stops hard has met a stone or a root. Pull it out and try a little to one side, or, as Cotswold Outdoor suggests, turn it and put it in again. Use a rubber mallet on aluminium pegs, which a steel hammer can bend.
The right peg for the ground
- Ordinary grass. Peg: aluminium alloy, 14cm to 18cm, with a three-sided, V or triangular profile. Why: light, and it grips well.
- Hard, stony or dry ground. Peg: forged steel, in 20cm, 30cm or 40cm, with a head that takes a hammer. Why: a thin peg bends before it goes in.
- Sand, snow and soft, wet ground. Peg: the wide U-shaped aluminium pegs, 23cm and 31cm. Why: in loose ground a peg holds by its surface area, so longer and wider holds better.
- Decking and wooden platforms. Peg: stainless spiral stakes that twist into the gap between the boards. Why: an ordinary peg has nowhere to go.
- Carrying it all day. Peg: titanium or carbon fibre; a 12cm carbon fibre peg weighs 3.7g. Why: the lightest strong pegs.
The tent pegs range has all of these. Take a few more than the tent needs, because pegs get lost and bent.
Guy lines: tension and the extra ones
Guy lines are the cords that run from the tent out to pegs in the ground. They hold the tent steady in wind, keep the flysheet taut so rain runs off instead of pooling, and keep the flysheet off the inner tent, where a touch lets water through. A tent with its guy lines left in the bag is a weaker tent, whatever its poles are made of.
Running them out
Run each line out in line with the seam or the pole it is sewn to, as the Club advises, rather than off at an angle, so it pulls the tent along its own shape. Peg it at the same angle as the tent pegs, leaning away. Then go round and tighten each line with its tensioner, the small slider or runner on the cord, until the fabric is smooth and taut. Even tension matters more than a single line pulled hard: one over-tight line pulls the tent out of shape and the others go slack.
Check them again
Fabric and cord give a little when wet, and nylon flysheets in particular stretch in rain and dew. Go round the lines again after rain and before bed, and tighten any that have gone slack.
The extra ones
Use every guy point the tent has. Many tents also have spare loops on the flysheet, sometimes called storm loops, and Cotswold Outdoor says to add lines to them in exposed or gusty spots. The guy lines range has reflective cord to cut to length, ready-made lines from 2mm to 4mm and tensioners for rope from 2mm to 10mm. Reflective lines show up in a torch beam, which saves trips in the dark.
Pitching in rain without getting the inside wet
The aim in rain is simple: get the waterproof layer up first and keep everything else in its bag until it is.
- Know your tent. If it is a flysheet-first or all-in-one tent, it is made for this: pitch the flysheet and only then clip in the inner from inside. Keep the inner rolled up in its bag until the flysheet is pegged down.
- With an inner-first tent, be quick. Two people, one on the poles and one on the pegs, and the flysheet ready to throw over before the inner goes up. On a long trip in a wet part of the country, a tarp held over the pitch while you work, or a flysheet-first tent, saves a lot of damp.
- Keep the doors zipped while you pitch, and keep wet bags, boots and waterproofs in the porch, not on the inner tent's floor.
- Dry your hands. Cotswold Outdoor suggests a small towel to dry your hands between steps, so you are not carrying rain onto the inner when you clip it in.
- Get the flysheet taut and check it does not touch the inner anywhere. Where the two touch, water passes through.
- Wipe the groundsheet with the towel before you bring bedding in, and lay out the sleeping bags last.
A flysheet's rating and its taped seams decide how long it keeps the rain out; the guide to waterproof ratings explains what the figures mean and why a well-rated tent can still be wet inside from condensation.
Pitching in wind: what to peg first
An unpegged tent is a large, light sheet of fabric that wants to fly. Peg the side the wind is coming from first, and never let go of the tent until it is pegged.
A tunnel tent
Lay it out with its low back end into the wind, and peg that end first, both corners. Then put in the poles, pull the tent out tight downwind and peg the front. The wind then blows the tent out into its shape instead of rolling it up. Peg out the guy lines on the windward end before the rest.
A dome tent
Peg the two windward corners before the poles go in, then put in the poles, raise the tent and peg the other corners. In a gust, lie a rucksack or the tent bag on the fabric to hold it down while you work. Although a dome stands on its own, an empty one is light and will roll away across a field in the wind, so peg it as soon as it stands.
An air tent
Peg out all the corners before you pump, and keep the pump connected until the beams are firm. A half-filled air tent is at its most floppy and the wind gets under it. Then peg out every guy line, because the beams give the shape, but only the pegs and lines hold it down.
Every tent
- Two people make it far easier: one to hold, one to peg.
- Pitch low and taut. Cotswold Outdoor says a low, taut pitch with a tight flysheet handles wind better than a baggy one.
- Peg the flysheet down low all round, so the wind cannot blow under it.
- Use every guy line, and the extra storm loops on an exposed pitch, and choose longer, stronger pegs in soft ground.
Striking camp, and packing a wet tent
Taking a tent down is where pegs get lost and tents get packed away to go mouldy.
Taking it down
- Empty the tent and sweep out the groundsheet.
- If the morning is dry and you have time, wait for the dew to dry off the flysheet.
- Loosen the guy lines and pull the pegs. Use the puller on the mallet, hooked under the peg's head, and lift along the line the peg went in. Pulling a peg out by its guy line tears the line or the tent.
- Count the pegs back into their bag.
- Take out the poles by pushing them back through their sleeves, not pulling them. Fold each pole from the middle outwards, so the elastic shock cord inside takes an even strain.
- Fold and roll the tent, pushing the air out towards the open end, and pack it.
When it has to go home wet
Sometimes there is no choice: it is raining on the last morning. Then keep the wet away from the dry. Take the inner out of the flysheet if it comes out, and pack the wet flysheet separately in a bin bag, so the inner and your bedding stay dry.
At home, dry it fully, the same day if you can; the tent care guide shows how. Put it up again in the garden, or hang it up, until every part is dry right through, seams and corners included. A tent packed damp grows mildew, which marks the fabric and harms its waterproof coating. Only then does it go back in its bag, stored loosely somewhere cool and dry.
Look it over
While it is up to dry, look for small holes, worn patches and seams that have started to lift, and mend them before the next trip. Patches and seam tape for that are in tent repair kits, and a bent or cracked pole can be replaced from tent poles if you know its diameter and length.
Questions people ask
Which way should the tent door face?
Away from the wind, so rain does not blow in when you open it. On a slope, the Camping and Caravanning Club says to face it downhill as well.
What angle do tent pegs go in at?
Commonly about 45 degrees, leaning away from the tent, pushed in until only the head shows. The pull of the line then presses the peg into the ground.
Can I pitch a tent on my own?
A dome tent, a small backpacking tent or an air tent, yes, with practice. A big pole tunnel tent is much easier with two, one to hold and one to peg, and in wind two people make any tent easier.
Should I dig a trench round my tent?
No. Most UK campsites do not allow it. Choose ground that drains instead: slightly raised, never in a dip.
Do I need to use every guy line?
On a calm night not always, but in wind or rain, yes. The guy lines take the load off the poles and keep the flysheet taut and off the inner.
How long can a tent stay packed wet?
As short a time as possible. Get it out and dry it fully at home the same day or the next, because mildew starts on damp fabric quickly.
Where to go next
- Pegging down: tent pegs, tent mallets and guy lines.
- Under the tent: groundsheets and footprints.
- Spares and mending: tent poles and tent repair kits.
- Tents that pitch in different ways: dome tents, tunnel tents and inflatable air tents.
- Read on: tent poles explained, air tents or pole tents, tent waterproof ratings explained and single, double and triple layer tents.
Delivery is included in every price and tracked to your door.